Preparation
- You need a
Serial Debugging Tool. In this guide, we will use aUSB to TTL Converter. You can find a CH340 USB to TTL Converter here.
Connections
Follow these steps to make the correct connections:
Connect the Tool Pins to the GPIOs, and check the Tx / Rx Pins once more to ensure that you’ve made correct connections:
- Tool Pin
GND: <—>Pin17of VIM’s GPIO - Tool Pin
TXD: <—>Pin18of VIM’s GPIO (Linux_Rx) - Tool Pin
RXD: <—>Pin19of VIM’s GPIO (Linux_Tx) - Tool Pin
VCC: <—>Pin20of VIM’s GPIO
- Tool Pin
Insert the USB-end into your PC.
The connections should look like this:

- Blue color line: Tool Pin
TXD - Orange color line: Tool Pin
RXD - Black color line: Tool Pin
GND
Another photo for more details (VCC Pin is not necessary):

Setup Serial Communication Program
On Ubuntu system, you can use minicom serial communication program.
- Install
minicom
1 | $ sudo apt update |
- Add access permission
1 | $ sudo usermod -a -G dialout $(whoami) |
You may need to logout or reboot your system.
- Setup
minicom
Before setup minicom, you need to connect the USB to TTL Converter tool to your device and computer.
1 | $ sudo minicom -s |
You will enter minicom setup mode, like this:
1 | +-----[configuration]------+ |
You can use up/down arrow on the keyboard to shift to Serial port setup item and hit Enter to Serial port setup menu.
1 | +-----------------------------------------------------------------------+ |
You can use Shift + A to setup the serial device, and hit Enter to confirm.
You can use Shift + E to setup the baudrate, choose 115200 and hit Enter to confirm.
You can use Shift + F to disable the hardware flow control, set to NO.
When you done all the setup, you can hit Enter to exit the menu, and then choose Save setup as dfl to save the configuration, then Exit from Minicom.
NoteYou need to replace the serial device node to the correct one on your computer.
- Launch
minicom
Type minicom command in terminal will enter the board serial terminal.
1 | $ minicom |
- Exit
minicom
You can use Ctrl + A + Z to lanuch the menu:
1 | +-------------------------------------------------------------------+ |
And use Shift + Q to exit minicom.
1 |
|
Choose Yes and hit Enter to exit minicom.
Tips
If the terminal output contains this line, you might need to type
sudo minicom.
To access U-boot, leave your USB-Serial-Debug tool connected, then press the
resetbutton on your device once. You should see some print-out on your terminal, then quickly press thespace-barorcontrol-cto stop auto-boot. You will see the prompt kvim# when you’ve entered u-boot.Note that to see the standard “help” commands as listed in the U-Boot Usage Guide, you’ll need to first have a version of Android or Ubuntu installed in your VIM device, from our krescue images.
You can use the U-Boot command line (kvim#), to change your VIM’s default boot logo.bmp, according to the guide, Boot Logo for U-Boot.
See Also
On Windows system, you can use SecureCRT serial communication program.
- Install USB to TTL Converter Driver
If you haven’t install USB to TTL Converter driver, you need to install it. Here we take CH340 as a example.
- Download the driver here
- Unzip the file
- Run the installer which you unzipped
- Install
SecureCRT
Please access SecureCRT official website to down and install it.
- Setup
SecureCRT
Before setup SecureCRT, you need to connect the USB to TTL Converter tool to your device and computer.
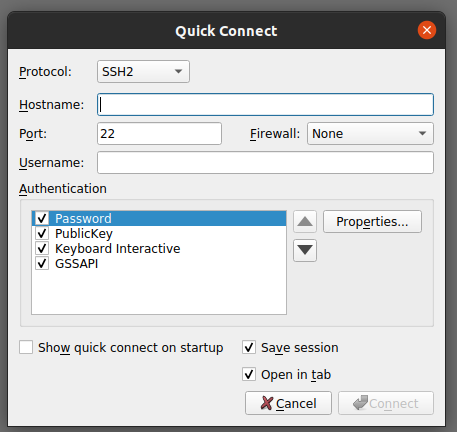
Launch SecureCRT and navigate to File->Quick Connect:
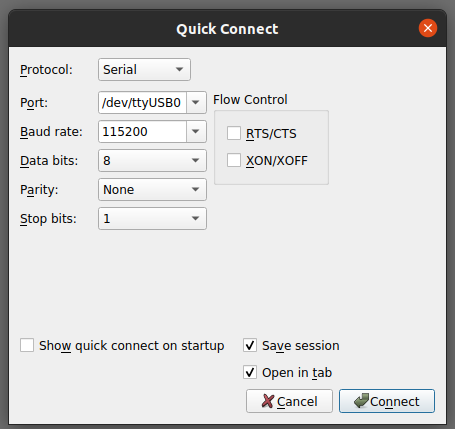
Select protol Serial, and select correct device node, baudrate set to 115200, unselect XON/XOFF.
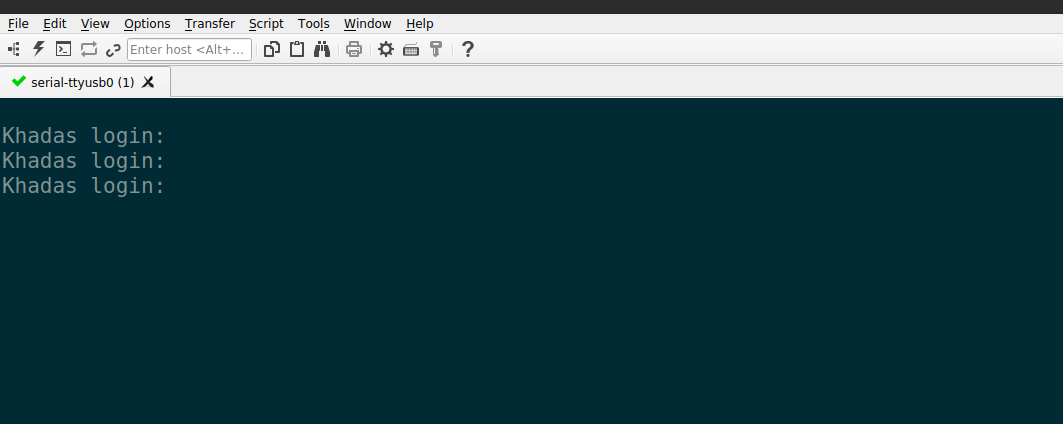
Then click Connect will enter the board serial terminal.
On Mac OS system, you can use minicom serial communication program.
- Setup the terminal
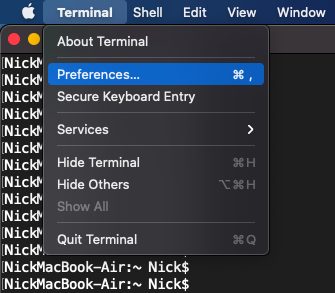
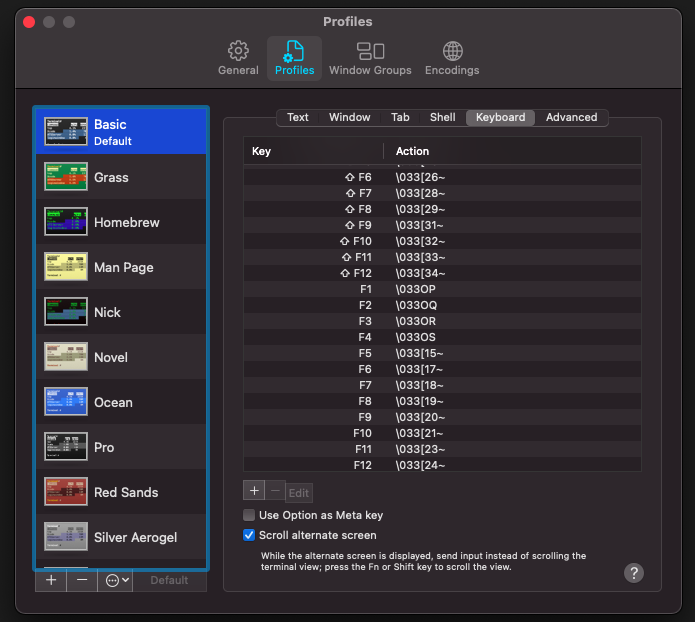
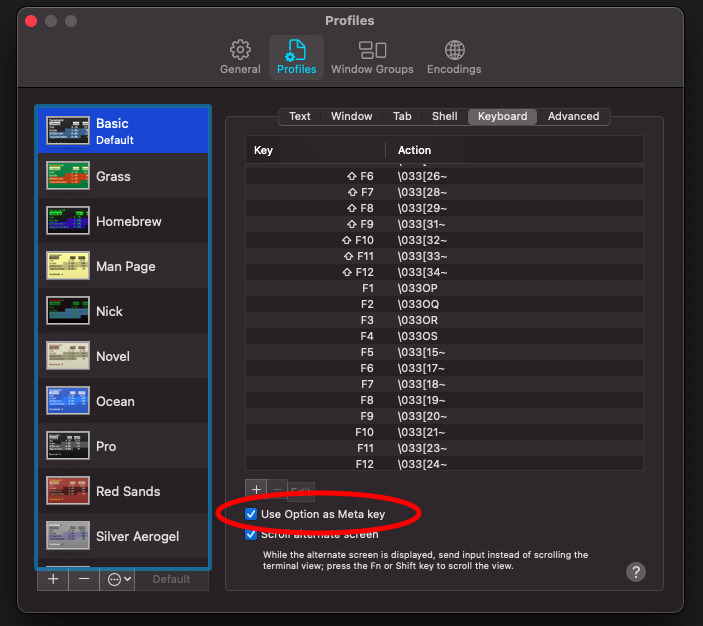
As minicom need Meta key, so you need to setup your terminal Meta option.
Go to Terminal->Preferences->Keyboard, select Use Option as Meta key.
- Install
minicom
You may need to install homebrew if you haven’t instll it.
1 | $ brew install minicom |
- Setup
minicom
Before setup minicom, you need to connect the USB to TTL Converter tool to your device and computer.
1 | $ minicom -s |
You will enter minicom setup mode, like this:
1 | ┌─────[configuration]──────┐ |
You can use up/down arrow on the keyboard to shift to Serial port setup item and hit Enter to Serial port setup menu.
1 | ┌───────────────────────────────────────────────────────────────────────┐ |
You can use Shift + A to setup the serial device, and hit Enter to confirm.
You can use Shift + E to setup the baudrate, choose 115200 and hit Enter to confirm.
You can use Shift + F to disable the hardware flow control, set to NO.
When you done all the setup, you can hit Enter to exit the menu, and then choose Save setup as dfl to save the configuration, then Exit from Minicom.
NoteYou need to replace the serial device node to the correct one on your computer.
- Launch
minicom
Type minicom command in terminal will enter the board serial terminal.
1 | $ minicom |
- Exit minicom
You can use option + Z to lanuch the menu:
1 | ┌───────────────────────────────────────────────────────────────────┐ |
And use Shift + Q to exit minicom.
1 |
|
Choose Yes and hit Enter to exit minicom.