+-----[configuration]------+ | Filenames and paths | | File transfer protocols | | Serial port setup | | Modem and dialing | | Screen and keyboard | | Save setup as dfl | | Save setup as.. | | Exit | | Exit from Minicom | +--------------------------+
可以使用键盘方向上下建进行导航切换到Serial port setup条目然后按回车键进入子目录。
1 2 3 4 5 6 7 8 9 10 11 12 13 14 15 16 17 18
+-----------------------------------------------------------------------+ | A - Serial Device : /dev/ttyUSB0 | | B - Lockfile Location : /var/lock | | C - Callin Program : | | D - Callout Program : | | E - Bps/Par/Bits : 115200 8N1 | | F - Hardware Flow Control : No | | G - Software Flow Control : No | | | | Change which setting? | +-----------------------------------------------------------------------+ | Screen and keyboard | | Save setup as dfl | | Save setup as.. | | Exit | | Exit from Minicom | +--------------------------+
使用Shift + A选择串口设备,按回车键确认。 使用Shift + E选择波特率,选择115200按回车键确认。 使用Shift + F关闭硬件流控制,设置为NO。 在一切都设置好后按回车键返回上一级菜单,然后选择Save setup as dfl保存配置,最后按Exit from Minicom退出设置。
提示
你需要根据你自己电脑上实际的串口设备节点来设置。
打开minicom
直接在终端执行minicom命令即可进入板子串口终端。
1 2 3 4 5 6 7 8 9 10 11 12 13 14
$ minicom elcome to minicom 2.7.1
OPTIONS: I18n Compiled on Dec 23 2019, 02:06:26. Port /dev/ttyUSB0, 15:24:13
Press CTRL-A Z for help on special keys
Ubuntu 20.04.2 LTS Khadas ttyS0
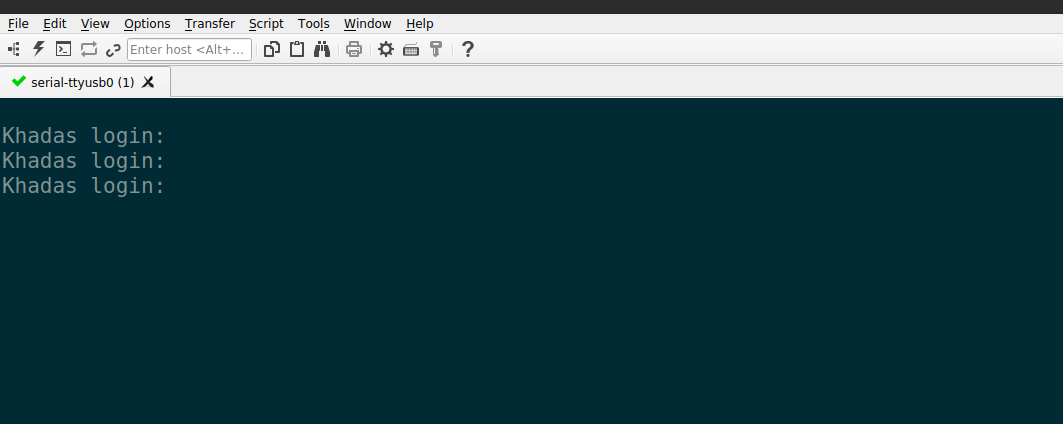
Khadas login: Khadas login: Khadas login:
退出minicom
使用Ctrl + A + Z打开设置菜单:
1 2 3 4 5 6 7 8 9 10 11 12 13 14 15 16 17 18 19
+-------------------------------------------------------------------+ | Minicom Command Summary | | | | Commands can be called by CTRL-A <key> | | | | Main Functions Other Functions | | | | Dialing directory..D run script (Go)....G | Clear Screen.......C | | Send files.........S Receive files......R | cOnfigure Minicom..O | | comm Parameters....P Add linefeed.......A | Suspend minicom....J | | Capture on/off.....L Hangup.............H | eXit and reset.....X | | send break.........F initialize Modem...M | Quit with no reset.Q | | Terminal settings..T run Kermit.........K | Cursor key mode....I | | lineWrap on/off....W local Echo on/off..E | Help screen........Z | | Paste file.........Y Timestamp toggle...N | scroll Back........B | | Add Carriage Ret...U | | | | Select function or press Enter for none. | +-------------------------------------------------------------------+
使用Shift + Q退出minicom。
1 2 3 4 5 6
+----------------------+ | Leave without reset? | | Yes No | +----------------------+
┌─────[configuration]──────┐ │ Filenames and paths │ │ File transfer protocols │ │ Serial port setup │ │ Modem and dialing │ │ Screen and keyboard │ │ Save setup as dfl │ │ Save setup as.. │ │ Exit │ │ Exit from Minicom │ └──────────────────────────┘
可以使用键盘方向上下建进行导航切换到Serial port setup条目然后按回车键进入子目录。
1 2 3 4 5 6 7 8 9 10 11 12 13 14 15 16 17 18
┌───────────────────────────────────────────────────────────────────────┐ │ A - Serial Device : /dev/tty.usbserial-1410 │ │ B - Lockfile Location : /usr/local/Cellar/minicom/2.7.1/var │ │ C - Callin Program : │ │ D - Callout Program : │ │ E - Bps/Par/Bits : 115200 8N1 │ │ F - Hardware Flow Control : No │ │ G - Software Flow Control : No │ │ │ │ Change which setting? │ └───────────────────────────────────────────────────────────────────────┘ │ Screen and keyboard │ │ Save setup as dfl │ │ Save setup as.. │ │ Exit │ │ Exit from Minicom │ └──────────────────────────┘
使用Shift + A选择串口设备,按回车键确认。 使用Shift + E选择波特率,选择115200按回车键确认。 使用Shift + F关闭硬件流控制,设置为NO。 在一切都设置好后按回车键返回上一级菜单,然后选择Save setup as dfl保存配置,最后按Exit from Minicom退出设置。
提示
你需要根据你自己电脑上实际的串口设备节点来设置。
打开minicom
直接在终端执行minicom命令即可进入板子串口终端。
1 2 3 4 5 6 7 8 9 10 11 12 13 14
$ minicom Welcome to minicom 2.7.1
OPTIONS: Compiled on Sep 18 2017, 15:01:35. Port /dev/tty.usbserial-1410, 16:02:04
Press Meta-Z for help on special keys
Ubuntu 20.04.2 LTS Khadas ttyS0
Khadas login: Khadas login: Khadas login:
退出minicom
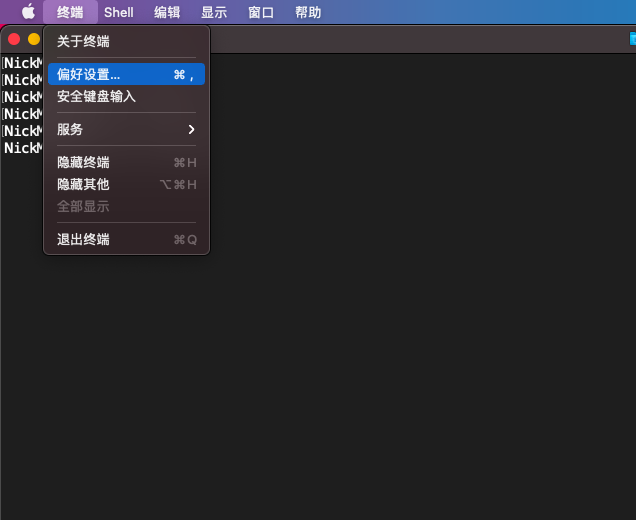
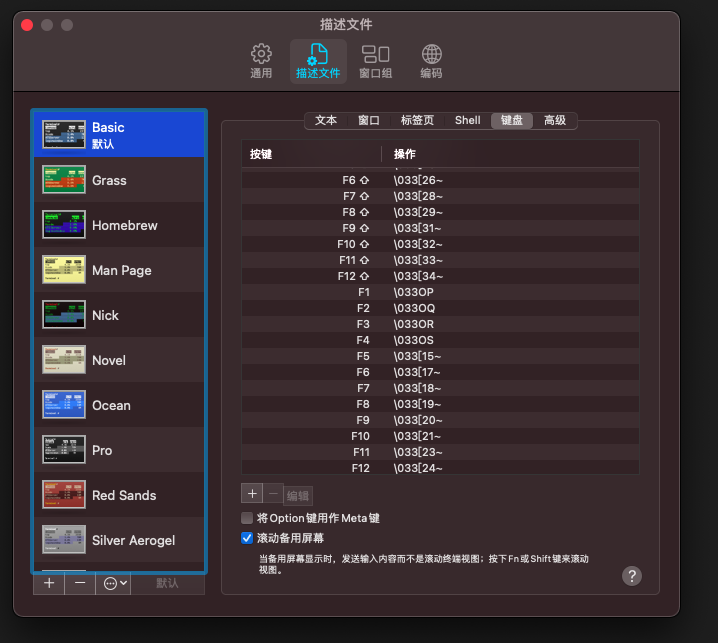
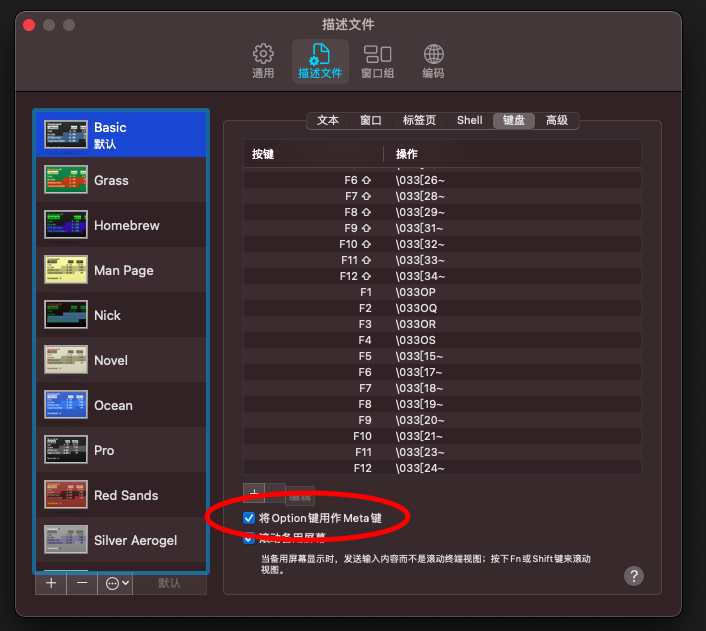
使用option + Z打开设置菜单:
1
2
3
4
5
6
7
8
9
10
11
12
13
14
15
16
17
18
19
┌───────────────────────────────────────────────────────────────────┐ │ Minicom Command Summary │ │ │ │ Commands can be called by Meta-<key> │ │ │ │ Main Functions Other Functions │ │ │ │ Dialing directory..D run script (Go)....G | Clear Screen.......C │ │ Send files.........S Receive files......R | cOnfigure Minicom..O │ │ comm Parameters....P Add linefeed.......A | Suspend minicom....J │ │ Capture on/off.....L Hangup.............H | eXit and reset.....X │ │ send break.........F initialize Modem...M | Quit with no reset.Q │ │ Terminal settings..T run Kermit.........K | Cursor key mode....I │ │ lineWrap on/off....W local Echo on/off..E | Help screen........Z │ │ Paste file.........Y Timestamp toggle...N | scroll Back........B │ │ Add Carriage Ret...U │ │ │ │ Select function or press Enter for none. │ └───────────────────────────────────────────────────────────────────┘
使用Shift + Q退出minicom。
1
2
3
4
5
6
+----------------------+
| Leave without reset? |
|     Yes       No     |
+----------------------+