Preparation
- Get a
Serial Debugging Tool, also known as aUSB to TTL Converter. For example, the CH340 USB to TTL Converter.
Connections
Use the following diagram to connect your serial tool to your board’s GPIOs:
- Tool Pin
GND: <—>Pin17of VIM’s GPIO - Tool Pin
TXD: <—>Pin18of VIM’s GPIO (Linux_Rx) - Tool Pin
RXD: <—>Pin19of VIM’s GPIO (Linux_Tx) - Tool Pin
VCC: <—>Pin20of VIM’s GPIO
- Tool Pin
Insert the USB-side of the tool into your computer.
Refer to this image:
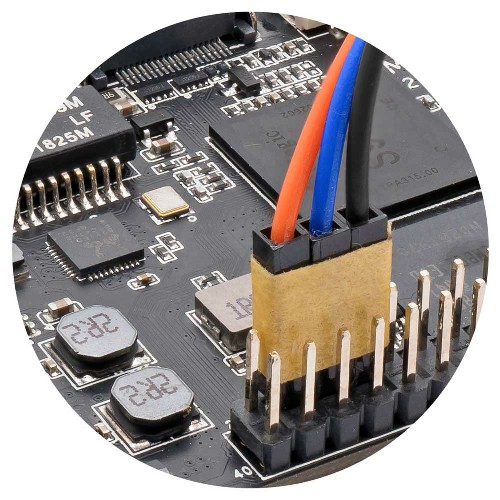
- Blue line:
TXD - Orange line:
RXD - Black line:
GND
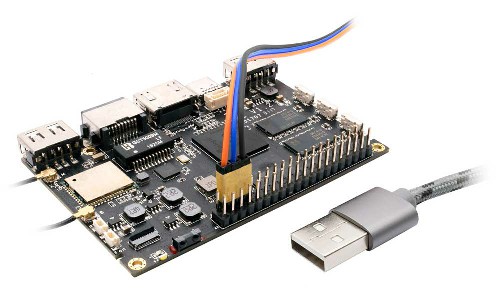
Another photo (don’t connect VCC):
Setup Serial Communication Program
Note
VIM1/VIM2/VIM3/VIM3LBaudrate: 115200
VIM4Baudrate: 921600
Use the minicom serial communication program.
- Install
minicom
1 | $ sudo apt update |
- Add access permissions
1 | $ sudo usermod -a -G dialout $(whoami) |
You may need to logout or reboot your system for changes to take effect.
- Setup
minicom
Connect the USB to TTL Converter tool to your SBC and computer before setting up minicom.
1 | $ sudo minicom -s |
Enter the minicom setup mode:
1 | +-----[configuration]------+ |
Use the up/down arrows to shift to Serial port setup, and hit Enter to enter the Serial port setup menu.
1 | +-----------------------------------------------------------------------+ |
You can use Shift + A to setup the serial device, hit Enter to confirm.
You can use Shift + E to setup the baudrate, choose 115200 and hit Enter to confirm.
You can use Shift + F to disable the hardware flow control, set to NO.
After completing the setup, hit Enter to exit, then choose Save setup as dfl, then Exit from Minicom.
NoteThe
serial device nodemust correspond to Ubuntu’s serial device node.
- Launch
minicom
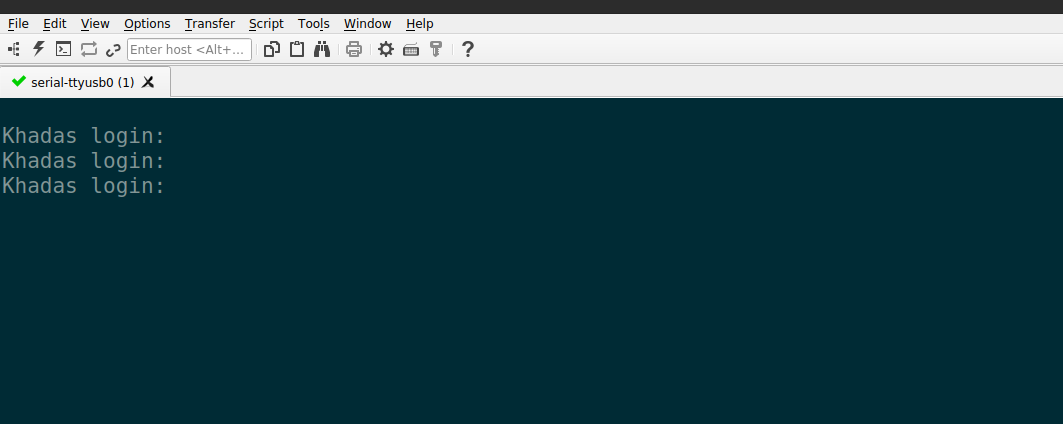
Type minicom into the Ubuntu Terminal:
1 | $ minicom |
- Exit
minicom
You can use Ctrl + A + Z to open the menu:
1 | +-------------------------------------------------------------------+ |
Use Shift + Q to exit minicom.
1 |
|
Choose Yes and hit Enter to exit minicom.
Tips
If the Terminal output contains this line, you need to use
sudo minicom.
To access U-Boot, leave your USB-Serial-Debug tool connected, then press the
resetbutton on your device once. You should see some print-out on your Terminal, then quickly press thespace-barorcontrol-cto stop auto-boot. You will see the prompt kvim# when you’ve entered U-boot.Standard “help” commands are listed in U-Boot Usage Guide, you’ll need to first have a version of Android or Ubuntu installed in your VIM device, from our official OOWOW images.
See Also
- Install the USB to TTL Driver
Install the CH340 driver.
- Download the driver.
- Unzip the compressed file.
- Run the installer.
- Install
SecureCRT
Download the program from the SecureCRT website.
- Setup
SecureCRT
Before starting SecureCRT, you’ll need to connect the USB to TTL Converter tool to your SBC and computer.
Launch SecureCRT and navigate to File->Quick Connect:
Select the Serial protocol, select the correct device node, set the baudrate to 115200, unselect XON/XOFF.
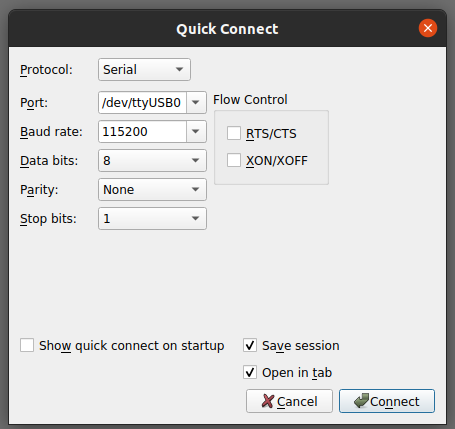
Click Connect.
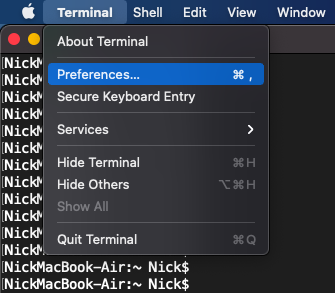
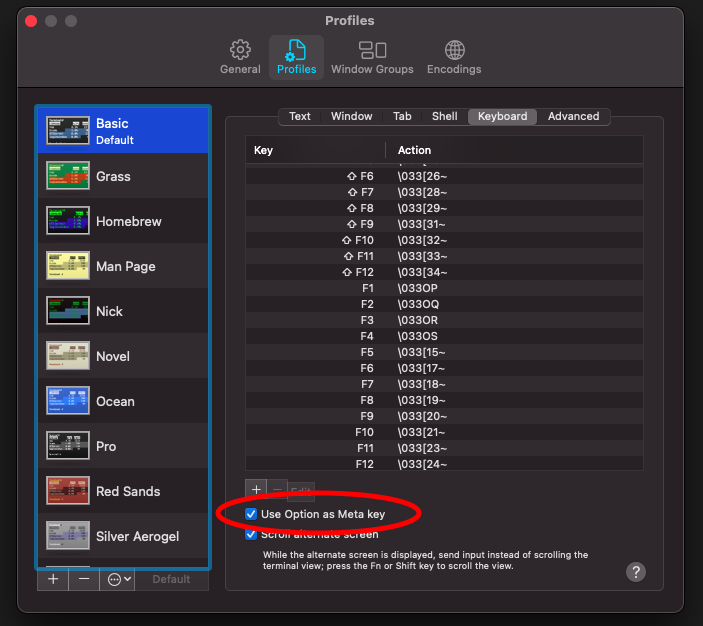
- Setup Meta key
minicom needs a Meta key. Use Terminal to create a Meta key.
Go to Terminal->Preferences->Keyboard, select Use Option as Meta key.

- Install
minicom
Use homebrew to install minicom.
1 | $ brew install minicom |
- Setup
minicom
Connect the USB to TTL Converter tool to your SBC and computer, then input the command:
1 | $ minicom -s |
Enter minicom setup mode:
1 | ┌─────[configuration]──────┐ |
Use up/down arrow on the keyboard to shift to the Serial port setup item and hit Enter to enter the Serial port setup menu.
1 | ┌───────────────────────────────────────────────────────────────────────┐ |
You can use Shift + A to setup the serial device, hit Enter to confirm.
You can use Shift + E to setup the baudrate, choose 115200 and hit Enter to confirm.
You can use Shift + F to disable the hardware flow control, set to NO.
After completing setup, hit Enter to exit, then choose Save setup as dfl to save the configuration, then choose Exit from Minicom.
NoteThe
serial device nodemust correspond to the Mac OS’ serial device node.
- Launch
minicom
Type minicom into the Mac OS Terminal, to access your SBC’s serial Terminal.
1 | $ minicom |
- Exit minicom
You can use option + Z to open the menu:
1 | ┌───────────────────────────────────────────────────────────────────┐ |
Use Shift + Q to exit minicom.
1 |
|
Choose Yes and hit Enter to exit minicom.