All VIM series boards have onboard eMMC storage, so you can install the OS into the eMMC using the USB upgrade tool.
Preparation
- Dowload the USB Upgrade Tool and extract it.
- Description of the USB Upgrade Tool’s directory contents:
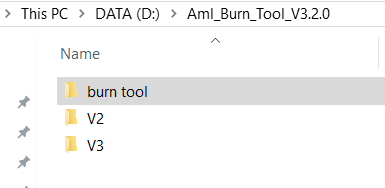
- The
V2andV3folders hold the original burning tool files - The
burn toolfolder stores burning tools and drivers for different boards
- Description of the
burn tooldirectory contents: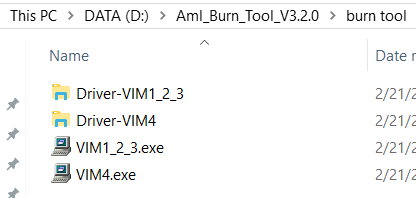
Driver-VIM1_2_3Driver files for VIM1/VIM2/VIM3/VIM3L boardsDriver-VIM4Driver files for the VIM4 boardVIM1_2_3.exeBurning tool for VIM1/VIM2/VIM3/VIM3L boardsVIM4.exeBurning tool for the VIM4 board
Installation
Driver Installation
- Enter the
Driver-VIM1_2_3directory, and installdpscat.exe. The installation process is quick, and there’s is no GUI display. - Install
dpinst64.exe. After the installation is successful, you can burn the firmware.
Make sure the driver is installed correctly, then follow the steps below to burn firmware:
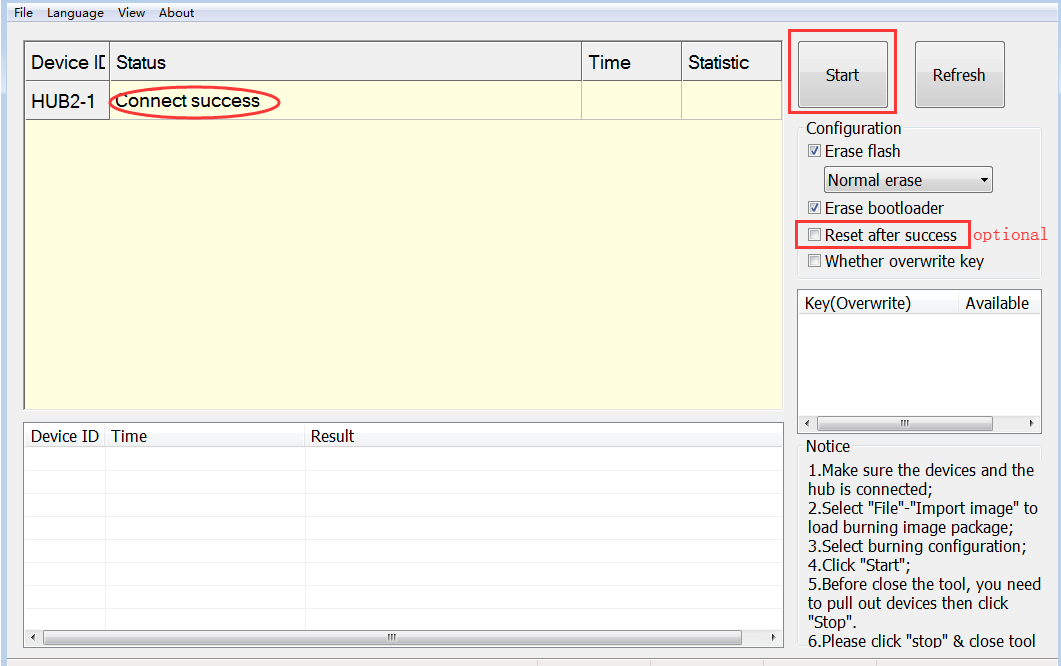
Enter the
burn tooldirectory, openVIM1_2_3.exe, clickFile-->Import Image, then choose an image for your board.Connect your board to your PC with a USB-C data cable (the board will power on automatically).
Put your board into Upgrade Mode.
If you have performed steps 2 and 3 correctly, your PC will automatically discover your board as an attached USB-device.
Now all you need to do is to click the
Startbutton and wait for burning to complete:
Driver Installation
- Enter the
Driver-VIM4directory, installdpscat.exe. The installation process is quick, and there is no GUI display. - Install
dpinst64.exe. After the installation is successful, you can burn the firmware.
Make sure the driver is installed correctly, then follow the steps below to upgrade:
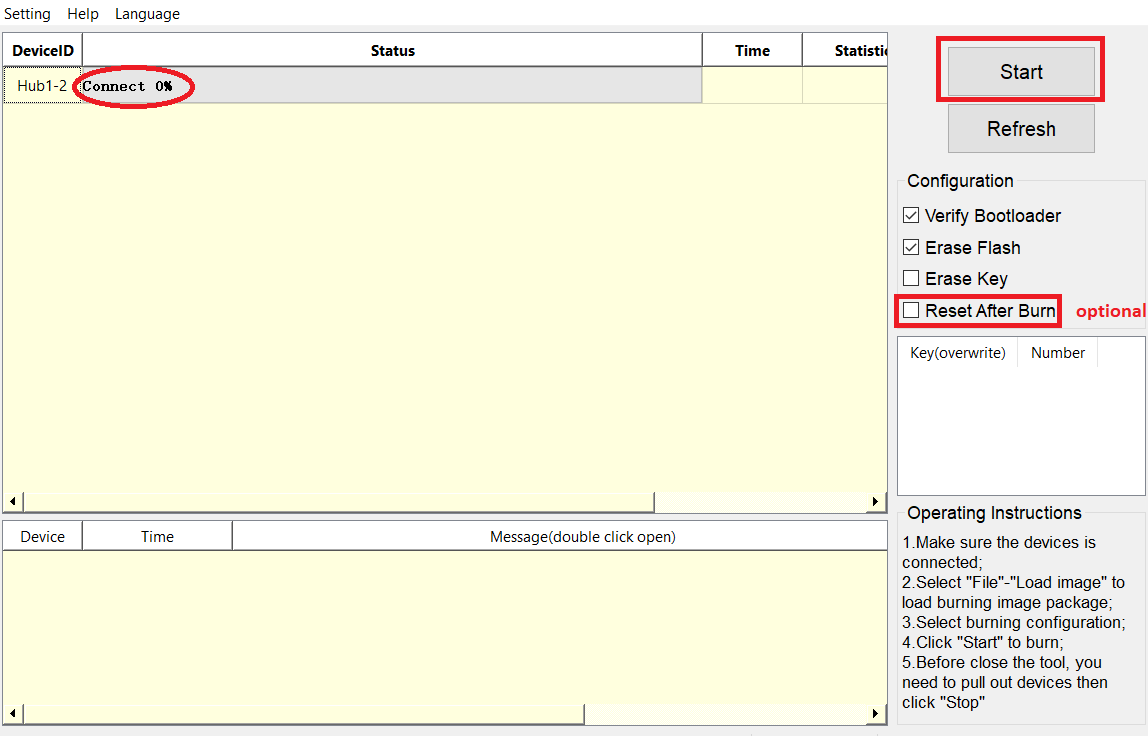
Enter the
burn tooldirectory, openVIM4.exe, clickSetup-->Load Image, then choose an image for your board.Connect your board to your PC with a USB-C data cable (the board will power on automatically).
Put your board into Upgrade Mode.
If you have performed steps 2 and 3 correctly, your PC will automatically discover your board as an attached USB-device.
Now all you need to do is to click the
Startbutton and wait for burning to complete:
Tips
- To interrupt burning, click the
Stopbutton, then close the USB Upgrade Tool. Note that the eMMC may already have been completely erased if you went past the 15% mark- An External Power Supply may be required in cases where your PC cannot provide enough electrical power for the burning process
- If your system is a 32-bit system, please select
dpinst32.exewhen installing the driver
NoteTools were verified to function properly on Ubuntu only, we make no guarantees for other Linux distributions!
Preparation
1 | $ sudo apt-get install libusb-dev git parted |
Download Burning Tool
Image burning tool for Ubuntu is in this repository utils.
1 | $ git clone https://github.com/khadas/utils |
Or just pull it (if you have already cloned this repository).
1 | $ cd /path/to/utils |
Install Burning Tool
You need to install USB rules and create some links.
1 | $ cd /path/to/utils |
You will see this print-out if it was successful.
1 | Installing Amlogic flash-tool... |
NoteRoot privilege is required.
Check the USB Driver
You must now place your board into Upgrade Mode. See how to enter upgrade mode.
Check to see if Ubuntu has detected your board as an attached USB-device.
1 | $ lsusb | grep Amlogic |
The message above means that your board is connected and recogized by Ubuntu.
Install the System on Ubuntu
1 | $ aml-burn-tool -i /path/to/image |
You will see these teminal logs if successful.
1 | Rebooting the board ........[OK] |
1 | $ aml-burn-tool -b VIM3 -i /path/to/image |
You will see these Terminal logs if successful.
1 | Rebooting the board ........[OK] |
1 | $ aml-burn-tool -b VIM4 -i /path/to/image |
For more information please refer to docs.
Uninstall Burning Tool
1 | $ cd /path/to/utils |