When a third-party application claims to use system permissions, it needs the platform key to sign in order to install normally
Signature in the environment of Linux khadas source code compilation
f you have a khadas source code compilation environment , you can sign in two ways
1) add LOCAL_CERTIFICATE := platform in the Android.mk, after you recompile your unsigned APK, it will have platform signature
2) Directly through the command to sign,the command is as follows
1 | java -Djava.library.path=out/host/linux-x86/lib64 -jar out/host/linux-x86/framework/signapk.jar build/target/product/security/platform.x509.pem build/target/product/security/platform.pk8 app-debug.apk app-debug-signed.apk |
app-debug.apk is the APK that states the system permission before signing ,if AndroidManifeset.xml include android:sharedUserid= “android.uid.system “,and the system signature of device is not added, failure install will appear in ADB install,error is failued install_failed_shared_user_incompatible, app-debug-signed.apk is a signed apk which can be installed directly in adb install
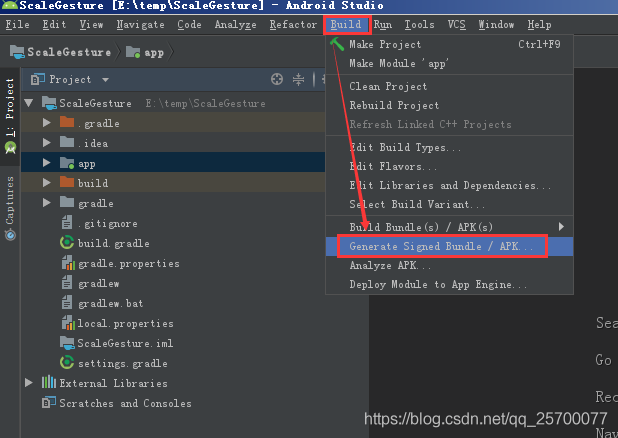
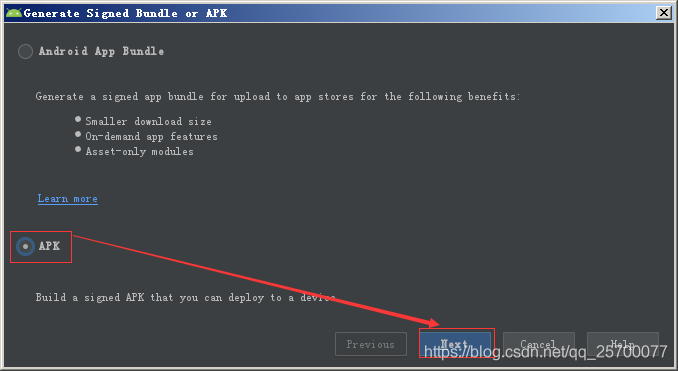
Sign on Android studio directly under Windows
1) Need to prepare keytool import keypair tool script, download address https://github.com/getfatday/keytool-importkeypair
platform.x509.pem,platform.pk8,are under build/target/product/security
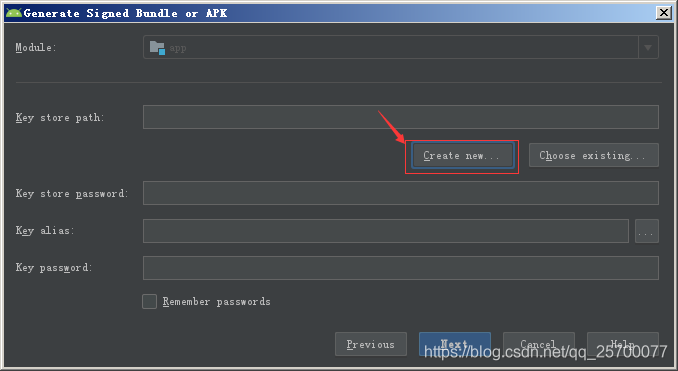
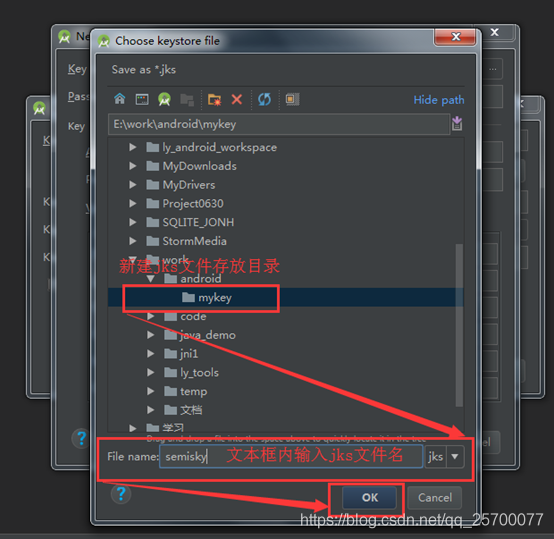
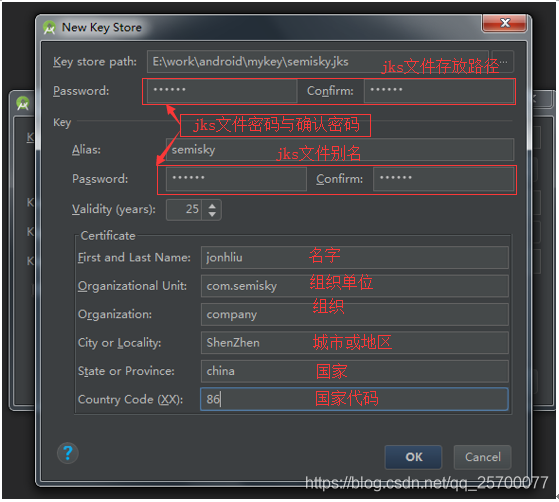
custom.jks file (android studio generates),detail can refer android studio jks file generates steps
android studio jks file generates steps
after custom.jks generated, the keytool import keypair script is used to generate the new platform signature custom.jks The command is as follows
1 | ./keytool-importkeypair -k custom.jks -p 123456 -pk8 platform.pk8 -cert platform.x509.pem -alias khadasdemo |
custom.jks is generated in Android studio, 123456 is the password you input when create custom.jks. Khadasdemo is the alias of the jks file
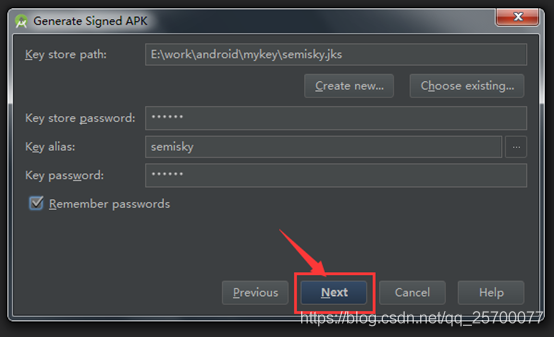
The new custom.jks with platform signature, it needs to be copied to the project directory of Android studio app and configured ,
In this way, the compiled app can be installed and run directly. Please refer to Android studio configuration custom.jks for details
Android studio configuration custom.jks
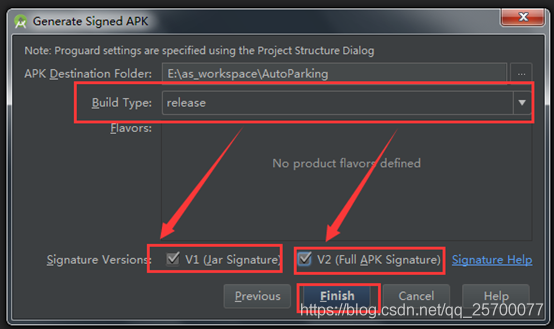
Under the project directory app build.gradle ,add signingconfigs configuration , fill in jks file store path, password and alias in turn
1 | signingConfigs { |
signApk/custom.jks is under app project directory
After add custom.jks , it can be directly compiled in Android studio, and the app can be normally installed on the machine with platform signature
jarsigner command to sign on windows
First of all, windows needs to install jdk to use the jarsigner command
1 | jarsigner -verbose -sigalg SHA1withRSA -digestalg SHA1 -keystore custom.jks app-debug.apk khadasdemo |
custom.jks:./keytool-importkeypair -k custom.jks -p 123456 -pk8 platform.pk8 -cert platform.x509.pem -alias khadasdemo ,this command to generate
khadasdemo :alias
password to input when execute command:123456
app-debug.apk :unsigned apk ,signed apk name is also app-debug.apk
noteBoth Android 7 and Android 9 can be signed in the above way,include vim vim2 vim3 vim3l